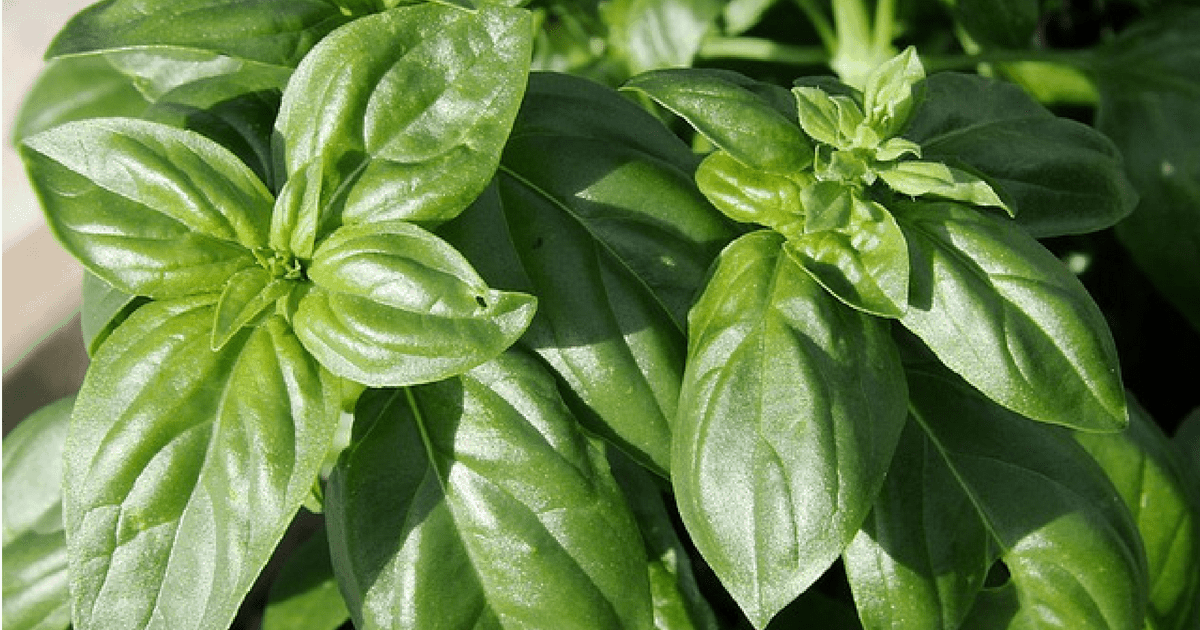
Fresh basil is a culinary delight, but its vibrant life in your kitchen is often fleeting. One moment it's a fragrant bouquet, the next it's a wilted shadow of its former self. For any home cook, gardener, or homesteader, mastering how to dry basil leaves is an invaluable skill. It allows you to capture that summer essence, preserving its potent flavor and beneficial nutrients for year-round enjoyment, transforming a fleeting herb into a pantry staple. This guide will walk you through three effective methods: air drying, oven drying, and using a dehydrator, ensuring you can keep your kitchen stocked with homegrown goodness.
The goal when drying basil isn't just to prevent spoilage; it's to concentrate and lock in the very best qualities of the herb – its intense aroma and unique flavor profile. The trick is to remove the moisture efficiently while retaining all the "good stuff" within the leaves. Each method offers its own advantages, whether you prioritize simplicity, speed, or precision.
Essential First Steps Before You Dry Basil
No matter which drying technique you choose, proper preparation is crucial for achieving high-quality dried basil. Skipping these initial steps can lead to undesirable results, such as moldy or less flavorful herbs.
- Wash Thoroughly: Begin by gently washing your basil leaves under cool, running water. This removes any dirt, dust, or tiny critters that might have taken up residence on your plants. Be gentle, as basil leaves are delicate.
- Pat Dry Completely: After washing, it’s critical to remove as much surface moisture as possible. Lay the basil leaves on clean paper towels or a soft kitchen towel and gently pat them dry. Excess water can hinder the drying process and encourage mold growth, especially in air-drying methods.
- Inspect and Discard: While washing, take a moment to inspect your basil. Remove any discolored, damaged, or pest-ridden leaves. You want only the healthiest, most vibrant leaves for drying.
Air Drying Basil: The Budget-Friendly & Traditional Way
For those who appreciate simplicity and cost-effectiveness, air drying is the quintessential method for preserving herbs like basil. It requires no special equipment beyond a suitable drying space and a little patience. This is often the preferred method for many homesteaders looking for budget-friendly, DIY ways to dry basil without a dehydrator.
How to Air Dry Basil Leaves Effectively:
- Harvesting Best Practices: For optimal flavor, harvest your basil in the morning after the dew has evaporated but before the intense midday sun. This is when the essential oils are most concentrated.
- Preparation for Drying:
- Separate Leaves: While some sources suggest drying basil in bunches, for the best results, it’s highly recommended to pluck the individual leaves from the stems. This maximizes air exposure to each leaf, promoting even drying and significantly reducing the risk of mold or browning. If you absolutely must dry in bunches, make them very small, ensuring air can circulate throughout.
- Single Layer Spread: This is arguably the most crucial step for successful air drying. Spread the clean, patted-dry basil leaves in a single layer.
- Choosing Your Drying Surface:
- Herb Drying Racks: These multi-tiered nets are designed for optimal air circulation.
- DIY Solutions: A simple frame with a mosquito net, a clean window screen, or even cooling racks placed over paper towels can work wonders. The key is to allow air to circulate from above and below the leaves.
- Ideal Drying Conditions:
- Location: Choose a dry room with excellent air circulation. An attic, a spare room, or a pantry with good airflow are ideal.
- Avoid Direct Sunlight: While heat helps with drying, direct sunlight can bleach the basil leaves, causing them to lose their vibrant green color and some of their volatile oils, diminishing flavor. Keep them in a shaded, well-ventilated spot.
- Humidity Control: Low humidity is paramount. High humidity will significantly prolong drying time and increase the risk of mold.
- Patience is Key: Air drying basil takes time. Depending on your climate and humidity levels, this process can take anywhere from 2 to 4 weeks. Check the leaves periodically, gently turning them if necessary to ensure even drying.
You’ll know your basil is perfectly air-dried when the leaves are brittle and easily crumble between your fingers.
Oven Drying Basil: A Quicker Alternative
If you're short on time or live in a humid environment where air drying is challenging, your oven can be a surprisingly effective tool for drying basil. The trick is to use the lowest possible temperature setting to gently coax the moisture out without cooking or burning the delicate leaves.
Step-by-Step Oven Drying Basil:
- Preheat Oven to Lowest Setting: The ideal temperature range for oven drying basil is typically 40-50°C (105-120°F). Many ovens have a "warm" setting or simply their lowest possible temperature. If your oven's lowest setting is higher than 50°C, monitor the basil even more closely to prevent scorching.
- Arrange Leaves on Baking Sheets: Spread the clean, dry basil leaves in a single layer on a parchment paper-lined baking sheet. Avoid overcrowding, as this will prevent even drying.
- Slow and Gentle Drying: Place the baking sheets in the preheated oven. It's often beneficial to leave the oven door slightly ajar (a wooden spoon can help prop it open) to allow moisture to escape and prevent the oven from getting too hot.
- Flip and Monitor: Dry the basil for several hours. Crucially, flip the leaves every hour to hour and a half to ensure uniform drying. Keep a close eye on them, especially if your oven's lowest temperature is above the recommended range. Drying time can vary from 2-4 hours, or even longer, depending on your oven and the basil's moisture content.
- Check for Dryness: The basil is fully dry when it's crispy and crumbles easily. If any parts still feel pliable, continue drying for a little longer, checking frequently.
Oven drying is significantly faster than air drying, but it demands your attention to prevent burning and ensure a quality product.
Dehydrator Drying Basil: The Controlled & Efficient Method
For those serious about herb preservation, a food dehydrator offers the most controlled and efficient way to dry basil. Dehydrators are designed to circulate warm, dry air uniformly, removing moisture quickly and consistently without the risk of scorching or uneven drying.
How to Dry Basil Leaves in a Dehydrator:
- Prepare Dehydrator Trays: Arrange the clean, patted-dry basil leaves in a single layer on your dehydrator trays. Ensure there's enough space between leaves for proper air circulation.
- Set Low Temperature: As with oven drying, a low temperature is key to preserving basil's delicate flavor and color. Set your food dehydrator to its lowest possible setting, typically around 35-40°C (95-105°F). Since basil leaves are thin, they don't require high heat.
- Dehydrate Until Crisp: Allow the dehydrator to work its magic. This method is generally faster than air drying and more consistent than oven drying, often taking just a few hours (typically 2-4 hours).
- Rotate Trays (Optional but Recommended): If your dehydrator doesn't have a built-in fan or has known hot spots, rotating the trays every hour or two can help ensure even drying.
- Test for Dryness: The basil is completely dry when it's brittle and crumbles easily when touched. There should be no pliability or softness left in the leaves.
Using a dehydrator provides an excellent balance of speed, efficiency, and quality, making it a favorite for those who regularly preserve garden harvests. For a deeper dive into optimizing your drying process with various tools, explore Mastering Dried Basil: Best Methods for Preserving Flavor & Nutrients.
Checking for Perfect Dryness and Storing Your Dried Basil
Regardless of the method you choose, knowing when your basil is truly dry is crucial for long-term storage. Properly dried basil should be:
- Crispy and Brittle: The leaves should feel completely dry to the touch, not pliable or leathery.
- Easily Crumbled: When you gently squeeze a dried leaf, it should readily crumble into small pieces, almost like a crisp chip.
If there's any moisture left, you risk mold growth during storage, ruining your efforts. Continue drying until every leaf meets these criteria.
Storing Your Precious Dried Basil:
Once your basil is perfectly dry, proper storage is paramount to maintain its flavor and extend its shelf life:
- Cool Down: Allow the dried basil to cool completely to room temperature before storing.
- Airtight Containers: Transfer the dried leaves (either whole or gently crumbled) into airtight containers. Glass jars with tight-fitting lids, or Mylar bags, are excellent choices.
- Dark and Cool Place: Store the containers in a cool, dark pantry or cupboard, away from direct sunlight, heat, and humidity. Light and heat can degrade the basil's color, flavor, and beneficial compounds.
- Shelf Life: Properly stored dried basil can maintain its peak flavor and aroma for up to 1-2 years. While it may still be safe to use beyond that, its potency will gradually diminish.
Why Preserve Basil? Beyond Just Avoiding Spoilage
The act of drying basil is more than just a means to prevent it from going bad. It's a deliberate choice to enhance and extend its culinary potential:
- Flavor Concentration: As moisture is removed, the flavors and essential oils within the basil leaves become more concentrated. This means a little dried basil can go a long way in imparting robust flavor to your dishes.
- Nutrient Preservation: While some delicate compounds can be lost with any processing, drying basil helps to preserve many of its beneficial vitamins and antioxidants, making it a healthier addition to your pantry than some heavily processed alternatives.
- Year-Round Enjoyment: Imagine enjoying the taste of summer pesto in the dead of winter! Dried basil makes this a reality, ensuring a supply of homegrown flavor for soups, sauces, stews, and dressings all year.
- Cost-Effective: Growing your own basil and drying it yourself is far more economical than repeatedly buying fresh bundles or those small, often underwhelming, jars of dried basil "dust" from the supermarket.
- Convenience & Zero Refrigeration: Dried basil is ready to use at a moment's notice, requires no refrigeration, and takes up minimal space, making it an incredibly convenient pantry staple.
Conclusion
Learning how to dry basil leaves opens up a world of culinary possibilities, allowing you to enjoy this aromatic herb long after its growing season has passed. Whether you opt for the time-honored tradition of air drying, the quicker convenience of oven drying, or the precise efficiency of a dehydrator, the result is a flavorful, shelf-stable ingredient ready to elevate your cooking. By following these techniques and focusing on proper preparation and storage, you can transform your abundant basil harvest into a treasured pantry staple, bringing the taste of summer sunshine to your table all year long.
